I've been doing a lot of painting
lately so I thought I’d pass along some tips I've learned in the process of
painting. Lots and lots of painting.
My current color combo love is grays with bright white trim. It was previously grayish green with bright white trim. I've never really been all that into bright colors - I did have a red wall once, but it got old pretty fast.
 |
| See - very pretty but no, not my house |
How to choose colors: go to a paint store, or Lowes or Home Depot, pick up a massive amount of samples, look online at what's popular, mix it all together with what you like, the style of home you live in, your furniture, put together a palette and wah lah! You've picked your paint colors!
Let me just say, every
time someone asks me what I’m doing and I say “painting!” I get the same thing,
“UGH, I HATE painting!!” No one ever
likes painting. Why is that? I like
painting. So then I have to ask myself, do
people truly HATE painting or are they not using the right tools which makes
painting a much bigger chore than it should be?
Because really, painting is one of the fastest, easiest, least costly
ways to update a room or to give it a whole new feel or even just make it look
new again.
So I ask again, do people really
hate painting? Or do they just need to
read my handy dandy post on why I find painting to not be all that horrible.
First, if you detest physical
labor of any kind, this post is not for you.
Go back to your LOL Catz, you will never like painting. If you don’t mind getting dirty and doing a
little work for a big reward. Read on my
friend!
OK, so I have to preface this
with the fact that I AM NOT A PROFESSIONAL.
Anything I say in this post is purely from opinion/experience having painted many,
many rooms and the exterior of an entire house.
Let's get started. Before you do anything, clear the
room. EVERYTHING in the room. Painting is a big enough job without having
to work around objects or worry about getting paint on them. So get everything out, even if you have to
temporarily put it in another room or the hallway, outside, doesn't matter. Clear the room.
| Empty! |
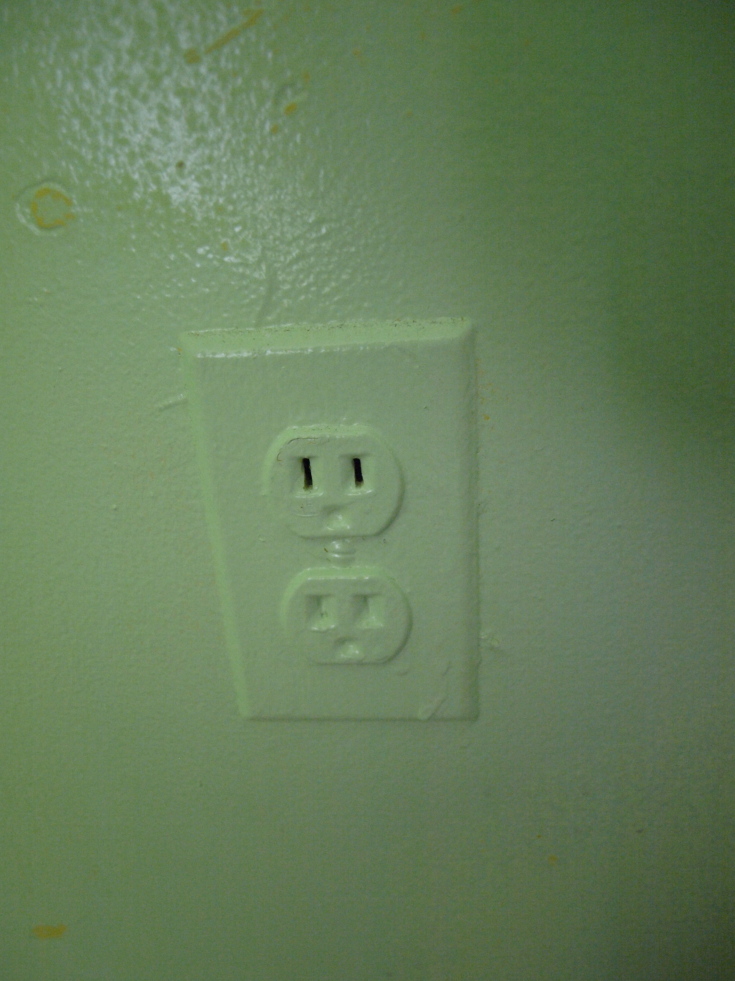
It amazes me that people don’t do
this and that it even needs saying, but, REMOVE ALL SWITCH AND OUTLET
COVERS! Yes, I’ve seen people paint
around them, even over them. Don’t do
that. It not only makes things harder,
but it’s just completely stupid and half assed.
 |
| I literally want to choke people for this! |
Remove any window coverings you
might have. No point in ruining them or
working around them. If you have curtain
rods, remove those as well, including the brackets. You can put them back later.
If you can, remove the light
fixture. If you can’t remove it, loosen
the screws that hold it in so it comes down from the ceiling slightly creating
a gap that is big enough to paint under with a paintbrush. If you can neither remove it or loosen it,
tape it off. This is the only time I
recommend tape. Light fixtures are expensive
and unless you plan on replacing it in the near future, protect it. You don’t want to get paint on your hardware
if you can help it. If you do, it’s not
the end of the world and as long as you get it off right away. The point here is to have a fixture in the
end that doesn’t have paint on it.
Right about now you should be
staring at a very empty, very clean room with no switch or outlet covers, a
removed, lowered or taped off light fixture, no window coverings or hardware.
Now you can see the room in all its
glory (or grossness) and assess the holes in the walls and in trim that need
filled, windows that may need caulking, cracks or seams that may need
attention. All very easy and will make
your end result much nicer. At this
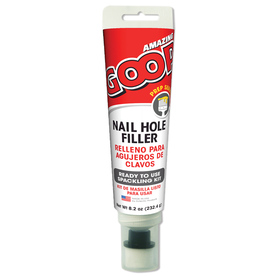
point in my painting I fill all the holes with either drywall mud or this tube
of stuff I got that is basically drywall mud but in a tube. The tube is easy, I think it cost $5, maybe
less. Completely worth it. Also, good to remember at this time is that
caulking is your friend. Unless you are
painting new construction, something is going to need caulked. It never hurts to seal up all the windows and
any cracks between the walls and trim.
You’ll just have a much nicer finished product.
 |
| This stuff is AMAZING! |
Ok, now we’re ready to actually
start painting! Well, not really - but almost!
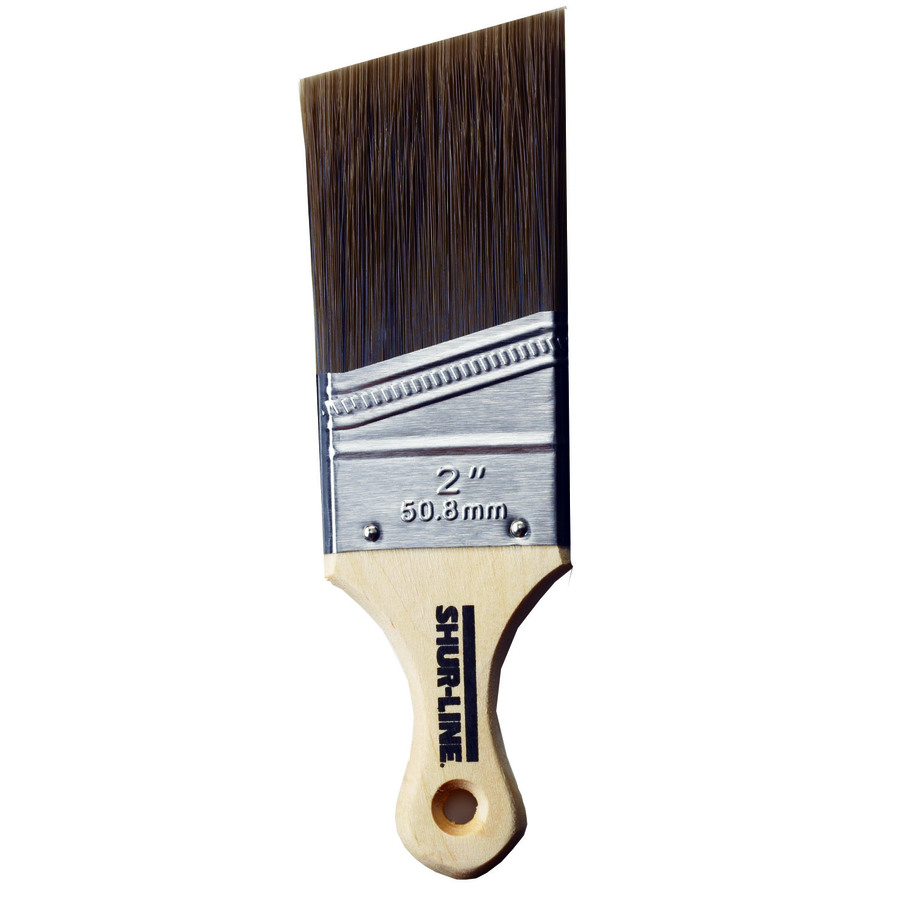
Number One: Gather your tools! The most important thing, I find, when
tackling a paint job is having an amazing paintbrush or three…..or five. OK, so I like paintbrushes! But really,
having a great paintbrush with a really great edge on it is the difference
between a total pain in the ass and an easily and quickly finished room. So when you buy your painting supplies, be
sure to pick up a good paintbrush or two.
Even if you never ever paint again because it truly IS the biggest pain
in the ass that you can think of, let me know, I’ll send you my address and you
can just wrap that paintbrush up and send it to me because I’ll always take a
good one off your hands. So number one:
DON’T SKIMP ON THE PAINTBRUSHES!
This is
my go to brush, however, mine doesn't look like
this anymore. There’s a little bit of
every color I've ever painted on the handle.
I like it that way.
 |
| Perfect! |
This is unnecessary and not what I’m
talking about when I say, “don’t skimp on the brushes”. This paintbrush is $120 and unless it does the painting for you, or you're a professional painter, or maybe just like to spend lots of money on paintbrushes, completely unnecessary.
 |
| Unnecessary expense |
This is what I mean. Don’t get the “value packs” or anything else
that comes in "multi" packages or that doesn't have an angle. A sharp angle.
 |
| Bad, bad, bad. You will want to murder this paintbrush. |
Since you’re going to take my
advice on the paintbrushes, I should also note that you will need a wire brush
to clean your marginally expensive and super awesome paintbrushes so they stay
super awesome. I have one like this. It’s small, works great and really really inexpensive, under $5 I think. A very small
price to pay to keep your brushes like new for years.
 |
| This little bad boy is a work horse! |
You’ll need a couple of rollers,
I usually grab a pack of at least three because I know I’ll need one, if not
now, for another project. Now, there are
all kinds of roller thicknesses out there.
Some say that you need a super thick one to paint popcorn ceilings or
heavy texture. I say, super thick
rollers suck up more paint, splatter more and in general cost more. I've never needed a roller than was anything
other than standard. For anything.
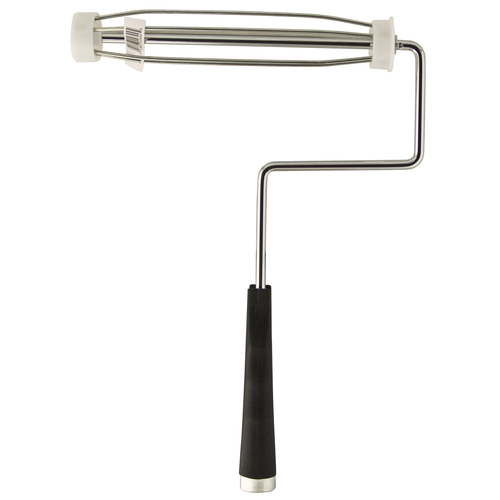
You’re going to need a roller
frame or whatever the cool kids are calling it these days, one of these (see below) and depending on
how high your ceilings are, an extension.
I have a step ladder so I don’t need an extension and we have 9 foot
ceilings. A roller frame doesn't have to be expensive, but don’t go with the cheapest one you can find
either. Cheap ones bend and you
eventually get a roller that’s more like a cone shape with one end dripping
paint all over the place and one that has no paint at all on it. Go middle of the road to be safe. Test it out, feel it, the people in the store
don’t mind. If it feels too bendy, it’s
going to be too bendy and you’re going to hate it when paint starts dripping
all over the floor, down your arm or flinging itself onto other surfaces
because of the force of the roller spinning with uneven surface
tension. Clearly this has happened to
me. Just take my word for it.
 |
| I had no idea what these things were called until I was looking for a pic to add to this post. Weird! |
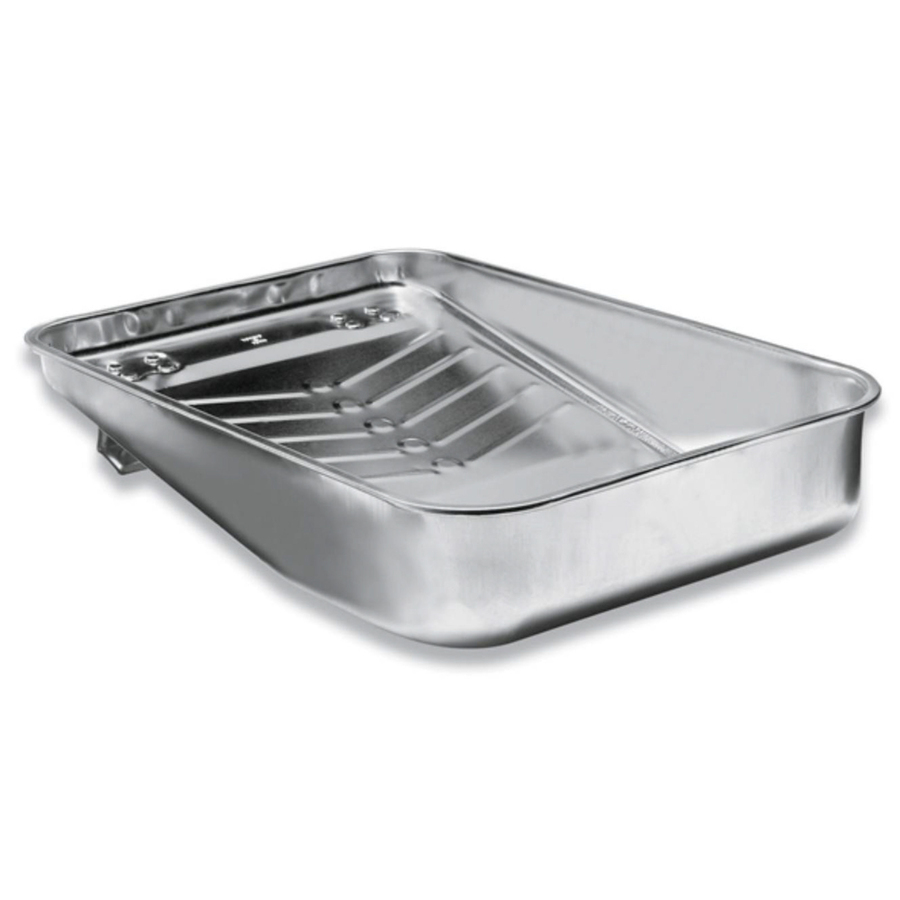
You’re going to need a paint tray
and DISPOSABLE paint tray liners. Having
the liners will save you a crap load of time in clean up and switching
paints. I just have your standard metal
one and I get the matching liners,
I think they come 10 to a package and well worth it.
 |
| Disposable liners will make this last FOREVER! |
You’re probably going to need a
step stool or a short ladder. It’s much
easier to do a good job when you can actually reach it. I’m vertically challenged so I use my step
stool for just about everything.
Get yourself a bucket of water
and a rag, cuz you’re going to need that too.
Now, here’s where what I do and what professionals do probably
varies. A lot. I don’t like drop cloths. I hate them actually. I hate plastic sheeting even more. And, I never tape off surfaces. To me it’s a huge waste of time. Heavily textured surfaces don’t actually tape off
very well and the paint bleeds under the tape anyway. There is a way to seal it by taping then
running a very thin line of caulking, then smoothing it out, etc. Or by taping off then sealing the line with
the same color of paint you’re trying to seal against. But no, I just don’t do
it unless I absolutely have to. I do
have a roll of painters tape though, mostly just to say I have it.
So, since I hate drop cloths and
plastic sheeting even more, how then do I keep paint off the floor? Well, lemmie tell you, by rolling
slowly. Mainly the ceiling. It tends to splatter. All over me, all over everything. By rolling slowly, you eliminate much of the
cast off that would normally be flinging itself about in a crazed manner. Also, by not having as thick of a
roller. See, there is a method to my
madness! Anyway, if you get a drip or
two here or there, that’s where you just get your bucket and rag and simply do
a spot clean before it dries. Cleaning a
spot here and there is so much better than sliding around on plastic or fighting
with a drop cloth. I also always have
bare feet. This is so I can feel if I've stepped in paint and stop before I track it all over the house.
 |
| Hopefully this NEVER happens |
If you don’t anticipate being
finished in a single day and will be leaving your paint, roller, brushes, etc out to
finish the next day, just wrap everything up in saran wrap, you know, the kind that
sticks to itself better than anything? Yeah, wrap it up in that, paint brush
loaded with paint, wrap it up. Roller,
wrap it up. Even cover the paint tray
with saran wrap. I just wrap it round
and round til it’s all covered and make sure all the places air could get in
are sealed, close up my bucket of paint and walk away. Saran wrap has saved me SO much time in
cleanup between painting and having to do other things. Remember, you bought decent tools, no need to
go ruining them.
So now, all your tools should be
gathered and you’re ready roll.
On to number two (finally): paint
the ceiling first! If you’re painting an
entire room as though it’s never been painted before and the ceiling needs
painted, paint it first. Overlap the
ceiling paint slightly onto the walls, being careful of drips of course, so when you
paint the walls there’s no possibility of the original wall color peeking
through where you failed to overlap in the tiny space between the ceiling and
wall. These are the things that SCREAM
DIY. And nobody wants that. Valspar makes this amazeballs ceiling paint
that goes on purple and dries a bright white. Don't be afraid of the second coat! A lot of paints claim to be a single coat with primer built in, but no. It all depends on what you're painting over.
 |
| Where have you been all my life? |
Why purple? I dunno why that color
specifically, but if you’ve ever painted a ceiling, you probably know that it’s
next to impossible to tell where you have and have not painted or where you've missed until it's dry and, too late. This is especially true if you are covering a glossy white
with a flat ceiling white (the proper white with the exception of bathrooms and
kitchens IMO). Flat paint looks just as
shiny when it’s wet as a glossy surface and good luck with that. I've only come across one time that the
purple tinted ceiling paint didn't work and that was when the ceiling was
already purple, and shiny, ugh. Just recently as a matter
of fact. Also good to note is that not
all ceiling paint is created equal and I only know this from experience. I
buy the brand of paint I do for a reason, it’s not even remotely yellow or gray. What one manufacturer calls white, may not
even be white at all. So if in doubt,
have it opened for you so you can actually LOOK at what’s in the can. Just remember, NOT ALL WHITES ARE CREATED
EQUAL! And a dingy white will make your
freshly painted ceilings look dirty.
Number three: if there is trim in the room that you will be
painting, do it next. I like to keep all
the trim in the house a bright, bright white.
White trim opens up a room and when all the trim in the house is the
same, its lends a cohesive feel EVEN if you paint the rooms different colors
(which I try not to because it freaks me out). If you can follow
the trim through the house, with it all being the same, there is a flow to the
house and it seems bigger, even if it’s tiny.
It makes small rooms seem larger as well. I use a satin bright white that is made by
Valspar and I keep a gallon of it on hand at all times for touch-ups. Bright white because I don’t like dingy
whites and satin because you can wipe it off if it gets dirty or dusty. When painting the trim, overlap slightly onto
the wall so that once again, there wont be a chance to see the original wall
color between the trim and the new wall color.
Also, the reason I paint the trim first and overlap slightly is because
it’s much easier for me to paint the walls to the trim than the other way
around. I can get a much straighter line
without using tape. If you are painting
baseboard in a carpeted room, you can use a piece of cardboard to paint DOWN to the carpet so you don’t get paint on it where it meets the baseboard. You can also tape off the carpet, but again,
I don’t. I don’t use cardboard either,
but that’s me and I don’t recommend that unless you have a lot of experience, a
steady hand and a REALLY GOOD PAINT BRUSH! Again, don't be afraid of the second coat, if you are covering a dark trim and haven't primed, chances are you are going to need it, possibly even a third but you won't regret it.
Number four: cut in the walls at
the ceiling, around windows, baseboard, etc.
This just is what it is folks and this is also where that good
paintbrush is going to make a world of difference. Cut in from the ceiling down and come down
far enough that there is at least a roller wide distance from the ceiling, I recommend more, but it's entirely up to you. If you make sure the cut is AT
LEAST that wide, you won’t be tempted to get as close to the ceiling as
possible, playing the “I can do it” game with the roller and without fail getting
wall paint on the ceiling. Don’t play
this game. No one wins. No one wants to touch up a ceiling with paint they've already put away.
The majority of the walls I've painted have been on really old houses.
I love old houses and all their charm and character but not usually what
a previous owner has done with the texture of the walls. A lot of people think that a heavy texture
will hide a multitude of sins when in reality it emphasizes them and makes the
surface really difficult to paint. I
mention this because I know I’m not the only one who has ever had to deal with
this. With that being said, when cutting
in from the ceiling, gravity will pull the paint that gets stuck in the
obnoxious texture downward slightly, this is fine as long as you don’t have
drips, just catch those as you see them before they dry. When cutting in around window trim on the
vertical, gravity will also pull the paint down slightly, just keep an eye on
it and it really shouldn't travel all that far if you’re not loading your brush
up too much.
This gravitational pull that we
love so much for keeping us on the ground, is not so great when you have a
heavily textured wall that you are cutting in at the baseboard. Paint likes to get stuck in the texture and
as soon as you aren't looking will run onto your freshly painted bright white
(or whatever color you choose) baseboard making you want to curse and swear
like a sailor. At least that’s what it
does to me because regardless of how very very careful I am, this happens at
least once in every room I've ever painted.
If this happens, don’t freak out, just wipe it off (another reason to
keep your bucket and rag close by) or wait and touch it up later. Though, I've gotten into the touch-up game
where I touch up the baseboard, only to now have to touch up the wall, then
back and forth and back and forth til I just say fuck it! Good enough!
Just make sure when you’re cutting
in around windows, doorways and baseboard that you again make it roughly as
wide as the roller so you aren't tempted to get too close with the roller and
end up getting wall paint on the trim.
Number five: time to paint the walls. Finally!!
So your ceiling is done, your trim is all freshly painted and now the
walls are cut in. Finishing up is a snap
and never takes that long as long as you've done everything else first. Pour your paint in the pan, like you did for the ceiling but never fill it too high. Filling too much just begs to get
paint sloshed all over the place. Now, get to rollin’! Again, slowly so you don’t
fling paint everywhere!
This would seem a given, but look
at what you’re doing. All surfaces
accept paint differently and you should be very aware of what is
happening. This will be the difference
between a shitty job and looking like you were either blind or didn't care when
painting and a room that looks amazing when finished. We all want the latter, so pay attention. Lighting is your friend. It’s very hard to paint properly in a poorly
lit space. If you’ve taken down the
lighting in the room itself, bring in task lighting or paint during the day
when you have natural light. I cannot
stress this enough. Painting in a dimly
lit space is worthless, you may as well not even do it.
OK, now your room is all painted
and looking beautiful! And here’s where
I would normally say you’re all done, clean up and GTFO! No, here’s where I say, DO sweat the small
stuff. It’s one of the times you
should. And here’s why:
You’ve just spent a day or so and
a good chunk of cash to repaint a room and bring it into this century. It’s looking all clean and nice and now it’s
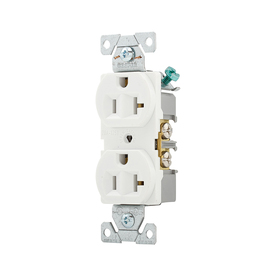
time to look at the details.
Light switches and outlets. They get dingy and dirty and discolored and
yellowed over time if they didn't start out yellow to begin with. Or off white.
What is off white anyway? Yellow’s bastard cousin that couldn't quite
cut it? Off white is gross. Looks
dirty. Anyway, back to the subject. You’ve painted your room, everything looks
bright and new and now you’ve got yellowed, dingy, dirty outlets and switches. You know what you do? You change em out! Yep.
Get rid of the old, put in new.
It’s really easy to do and makes a HUGE difference. It’s also really cheap, you can get a box of
10 outlets for $25 and switches are about the same for standard run of the mill outlets and switches.
I did this in my first house that is now rented and I’m working my way
through the house I’m in now. Since I
keep the trim white in all the rooms, new white outlets and switches work just
fine. Once you
change out a few, you’ll get the hang of it and stop shutting off the power
every time (SO not recommended!!). It’s
really that easy.

Whatever color you choose, make
sure to look at the details. It finishes
a room.
Here are a couple of other things
that I thought I’d throw in:
If you’re letting a child pick
their own color for their room, narrow the choices down to colors that you
would actually be ok with painting in your house. It sounds deceptive, and it is, but you won’t
end up with anything too heinous.
Children, bless their hearts, will ALWAYS pick the most obnoxious color
they see first and stick to it. And once
you’ve told them they can, you can’t tell them no now (well, you probably can, but I like to stick to my word as much as possible in order to create trust). This is a lesson recently learned and, while I
thought I had the selections narrowed, clearly I had not narrowed far enough
and really didn't expect her to choose the atomic pink that she did but that I
was now committed to painting for her.
Children, bless their little hearts, love to help. It’s just their
nature. Unless they are teenagers, then
the opposite is true. But children, the
age I have now, love to help. It’s a
quality that as adults I wish we didn't outgrow so much. However, here’s the trouble with helpful children,
they SUCK at painting. Like, really really bad. And, they’re super messy and don’t
really understand the concept of paint staining things or that it doesn't belong in certain places and that extreme brush marks are nearly impossible to
get rid of. Also, have you ever seen a poor
little kitten be loved to death by a child? Yeah, that’s what they’ll do to
your paint brushes. They will be
rendered useless. If possible, send them
to grammas or distract them or give them their own project and thank them for their WANTING to help, but
having a child help you is basically asking for MORE work.
 |
| Really REALLY pink room - and yes, the doors got the bright white paint treatment too |
 |
| Pay no mind to that wavy line above the window, that's since been fixed |
I've talked a couple times about
the dreaded over textured walls in older homes and how much I (don’t) love
them. Here’s the thing about overly
textured walls though, if you are patient with the painting, you’ll have no trouble
at all. Another thing is that older
homes have defects and have been repaired more than once and they have
character and the fact that they’re still standing when they’re over 100 years
old gives me some kind of comfort. So,
when you’re painting wavy, uneven, highly textured walls, USE FLAT PAINT. You know why? Because the light won’t reflect
off of all the imperfect surfaces and your walls will appear to have fewer
defects and it will soften up a room.
Glossy paint has its place, but it’s not on bedroom or living space
walls. Light bouncing around on walls
makes rooms seem harsh. That’s also why
ceilings are typically flat. Bouncing
light. Don’t want it. It’s also the reason why ladies, unless you
have a near perfect figure, you don’t wear shimmery snug satin. It picks up all the imperfections and
amplifies them by a thousand.
So there you have it. I’m a serial painter and I love it. Keeping rooms in your home painted keeps it
current without spending a lot of money.
Keeping the colors to a minimum creates a cohesive atmosphere in the
house and makes it seem larger. Keep a
bit of your colors on hand at all times for touch-ups. Walls get dinged, crap
happens in a house with kids and animals, it doesn't mean you have to just live
with it.
 |
| My actual house (rental) - green with white trim/doors |
No comments:
Post a Comment